
With the days remaining in winter slowly ticking away, it is time to start planning spring interior design ideas. To this effect, one simple way to add a seasonal element to your home’s interior is by applying wallpaper. If wallpaper will be a feature in your interior design plans, consider the following tips on how to hang wallpaper to make the end result as stunning as possible.
Choose the Paper
There are many different types of wallpapers from which you can choose, including options such as silk, vinyl, and wood veneer. Most wallpapers are paper-backed vinyl, which is less-tear prone than plain paper and more forgiving than options such as silk, which will be irrevocably damaged should paste get on its face.
Set Up the Room
It is important to completely clear the room of any elements that will not be used for papering the wall. Generally, you will only need the paper itself, a box cutter for trimming, a large table for cutting the strips, and a bucket for water. If your wallpaper is not adhesive-backed, you will need a roller to apply the adhesive.
If the walls are in bad condition, you will need to use a quality wall paint remover to ensure that the walls are smooth, as chipped or protruding paint can affect how the wallpaper adheres.
Cut a small strip of wallpaper. Place the paper on the wall and, using a level, draw a plumb line at the paper’s leading edge. Continue moving the paper around the room to mark where each strip will lay.
Book the Paper
After all of the marks have been made, cut a full-length strip. One of the keys on how to measure wallpaper is that one inch of overhang should be allowed for solid-colored wallpaper and enough overhang so that the dominant element of the wallpaper is at the center point of the wall for patterned paper.
After the strip has been cut, you must book the wallpaper. For adhesive-backed wallpapers, this involves soaking the adhesive side of the paper in water for 30 seconds and then folding the paper in half (like a book) so that the paper rests, adhesive-on-adhesive, for 3 to 5 minutes. For non-adhesive-backed papers, evenly roll the adhesive on the back of the paper before booking, also resting for 3 to 5 minutes.
Hang the First Strip
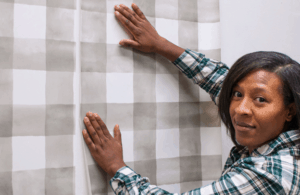
Carry the booked strip to the wall and unfold, applying the top half first. It should be even with the previously marked plumb line.
Smooth the edges of the paper with a damp sponge. Next, lightly brush from the center of the strip to the edges. Finally, pull a smoother across the paper to anchor the paper to the wall and eliminate wrinkles.
After you are happy with the top half of the paper, repeat the same process for the bottom half.
Trim Paper at the Ceiling
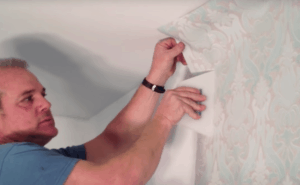
Using a box cutter or X-Acto knife, trim away the excess paper. The knife should be held nearly parallel to the wall when cutting. A putty knife can be used to hold the blade in place as you guide the knife along the intersection, preventing any slipping or tearing.
If any adhesive gets on the paper’s face during this process, use a sponge to gently push the adhesive to the edges and clean any castoff adhesive that gets on the moulding or ceiling.
Add Paper to the Corners
The corners are the only places where wallpaper strips should overlap. For an inside corner, measure from the top, middle, and bottom of the last pasted strip and use a level to help you cut a strip to that width, cutting the edge that will meet the corner. Hang the paper so that this edge will turn the corner and extend onto the next wall. For the adjoining strip, align the patterns and overlap the corner strip that it extends onto the new wall.
With outside corners, trim the strip to overlap the next wall by ¼ inch. Hang the adjoining strip so that it overlaps the previous piece but falls short of the corner, which will prevent the wallpaper from peeling if brushed against.
Clean Up Around Windows and Doors
Trimming around windows and doors is similar to trimming where the wall and ceiling intersect. However, you will pare down the overhang by making diagonal cuts with scissors. Then, when using a box cutter to clean up the remainder, it is important to remember to make your cuts from the edge of the paper to where the casing and wall meet, using a putty knife to hold the blade in place.
Apply Paper to Headers and Footers
The areas above and below windows and doorways will be papered similar to how full-spanning sections of the wall are papered. However, you may need to use a smaller torpedo level to make your plumb lines, and it is important to remember not to extend your headers and footers past the point where the casement ends.
Conclusion
Wallpaper is a simple way to add a seasonal element to your interior design efforts. By using the steps listed above, a straightforward DIY wallpaper installation can make your home stunning this springtime.
Matt Lee is the owner of the Innovative Building Materials blog and a content writer for the building materials industry. He is focused on helping fellow homeowners, contractors, and architects discover materials and methods of construction that save money, improve energy efficiency, and increase property value.