
Welcome, homeowners and DIY enthusiasts, to our comprehensive guide on roofing repairs and upgrades. Your roof is your first line of defense against the elements, shielding you and your family from rain, wind, and harsh sunlight. However, wear and tear can compromise its integrity over time, leading to leaks, drafts, and potentially costly damage to your home's interior.
Enhancing Energy Efficiency
Upgrading your roof presents an excellent opportunity to enhance your home's energy efficiency. Consider installing energy-efficient roofing materials such as reflective shingles or metal roofing, which can help reduce heat absorption and lower cooling costs during the summer months. For energy efficiency, metal roofing services can provide long-lasting protection while reducing cooling costs and minimizing environmental impact. Additionally, improving insulation in the attic can further enhance energy efficiency by minimizing heat transfer and reducing heating and cooling costs year-round.
Assessing the Damage
The first step in any roofing project is a thorough assessment of the damage. Climbing up to your roof, inspect for missing or damaged shingles, signs of water intrusion, and any areas of sagging or deterioration. Pay close attention to flashing around chimneys, vents, and skylights, as these are common trouble spots for leaks. Additionally, check the attic for signs of water stains or mold, which can indicate a leaky roof.
- Start by conducting a visual inspection from the ground, scanning for any obvious signs of damage such as missing or curling shingles, or areas of discoloration.
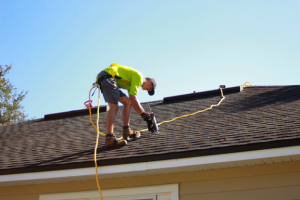
- Climb onto your roof (with caution and proper safety equipment) to get a closer look at problem areas. Pay attention to the condition of the shingles, flashing, and seals around vents and chimneys.
- Use binoculars to inspect hard-to-reach areas or consider hiring a professional roofing inspector for a more thorough assessment, especially if you're unsure about the extent of the damage.
- Don't forget to check the interior of your home for signs of water damage, such as water stains on ceilings or walls, which can indicate a roof leak that may not be immediately visible from the outside.
Repairing Shingles and Flashing
Once you've identified the areas in need of attention, it's time to get to work repairing them. For damaged shingles, carefully remove the old ones and replace them with new ones, ensuring they're properly secured and sealed. Similarly, damaged flashing should be removed and replaced with new flashing to prevent water from seeping into your home. Proper installation and sealing are crucial to ensure a watertight seal and long-lasting protection.
Reinforcing Structural Integrity
In some cases, roofing issues may extend beyond surface damage to underlying structural issues. Sagging areas or weakened roof decking may require reinforcement to ensure the stability and integrity of your roof. Consult with a professional contractor to assess the extent of the damage and determine the appropriate course of action, which may involve reinforcing rafters, trusses, or decking to restore structural integrity.
- Identify Weak Points: Begin by identifying areas of your roof that show signs of weakness or damage. This may include sagging sections, cracked rafters, or deteriorated decking. Thoroughly inspect both the interior and exterior of your roof to pinpoint areas in need of reinforcement.
- Implement Reinforcement Techniques: Depending on the extent of the damage, reinforcement techniques may vary. This could involve sistering new rafters alongside damaged ones, installing support beams, or replacing sections of compromised decking. These measures are essential for restoring stability and ensuring your roof can withstand the elements for years to come.
- Prioritize Safety: Use appropriate safety gear such as harnesses, hard hats, and non-slip footwear, and never work alone. If the repairs require accessing heights or working with heavy materials, consider hiring professional contractors with experience in working at elevated levels.
Adding Protective Coatings
Applying protective coatings to your roof can extend its lifespan and enhance its resistance to the elements. Options such as elastomeric coatings can provide a durable barrier against water, UV rays, and thermal expansion and contraction, helping to prevent leaks and prolong the life of your roof. These coatings can also improve the overall appearance of your roof, giving it a fresh, rejuvenated look.
Investing in Sustainable Solutions
For environmentally conscious homeowners, investing in sustainable roofing solutions can offer long-term benefits for both your home and the planet. Options such as solar panels or green roofs not only reduce your carbon footprint but also offer potential savings on energy costs and contribute to a healthier environment. Explore these eco-friendly options to see how they can fit into your roofing repair and upgrade plans.
Your roof is a vital component of your home's structure, and ensuring its integrity is essential to protecting your investment and maintaining your comfort and safety. By following the steps outlined in this guide, you can address common roofing issues, enhance energy efficiency, and even embrace sustainable solutions to elevate your roof above and beyond mere functionality. When it comes to roofing repairs and upgrades, attention to detail and quality craftsmanship are key to achieving lasting results.